Cross platform mobile development – Part 1 .
This tutorial will help you to develop an Android application using PhoneGap (Cross Platform Technology).
1. Requirements
Eclipse 3.4+.
Android sdk.
ADT Plugin.
Cordova libraries.
2. Install SDK + Cordova
Download and install Eclipse Classic.
Download and install Android SDK.
Download and install ADT Plugin.
Download the latest copy of Cordova and extract its contents.
3. Setup New Project
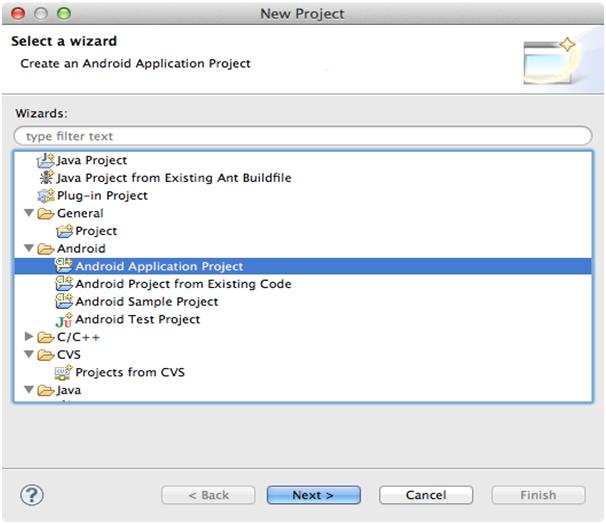
Launch Eclipse, and select menu item New Project. Select Android Application project.
Then specify an Application Name, a Project Name and Package Name with Namespace. Keep on clicking next till you get the following screen.
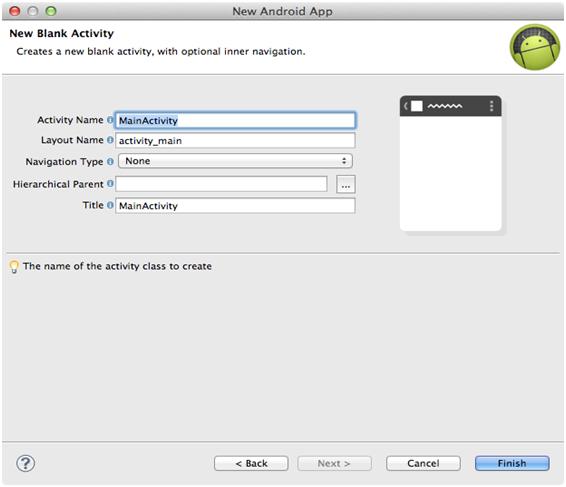
- Enter the desired Activity and layout names and press finish.
- In Android Activity is a java file and layout is and xml file. Activity takes care of the logic where as xml takes care of the User Interface. But in phonegap you need not worry about all this.
- In the root directory of your project, create two new directories(if not present):
- /libs
- assets/www
- Copy cordova-2.0.0.js from your Cordova download earlier to assets/www
- Copy cordova-2.0.0.jar from your Cordova download earlier to /libs
- Copy xml folder from your Cordova download earlier to /res
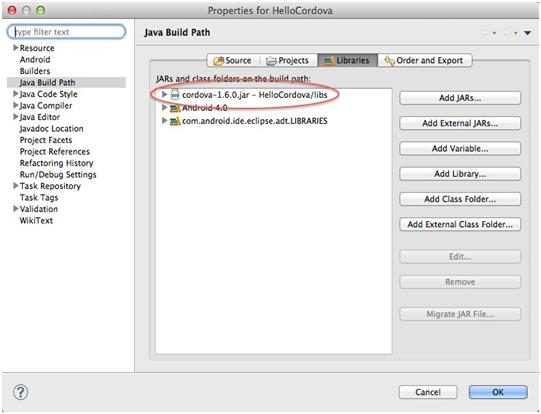
- Verify that cordova-2.0.0.jar is listed in the Build Path for your project.
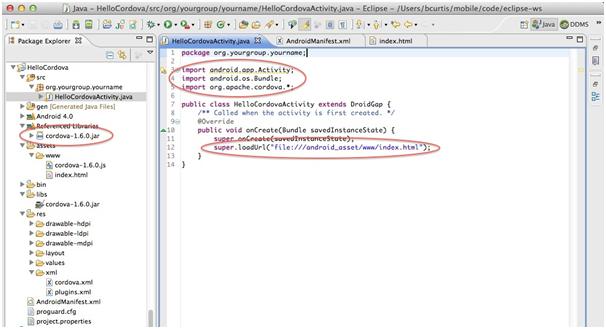
Edit your project’s main Java file found in the src folder in Eclipse:
Add import org.apache.cordova.*;
Change the class’s extend from Activity to DroidGap.
Replace the setContentView() line with super.loadUrl(“file:///android_asset/www/index.html”);
-
- Right click on AndroidManifest.xml and select Open With > Text Editor.
- Paste the following permissions between the <uses-sdk…/> and <application…/> tags.
<supports-screens android:largeScreens=”trueandroid:normalScreens=”true
android:smallScreens=”true” android:resizeable=”true” android:anyDensity=”true” />
<uses-permission android:name=”android.permission.VIBRATE” />
<uses-permission android:name=”android.permission.ACCESS_COARSE_LOCATION” />
<uses-permission android:name=”android.permission.ACCESS_FINE_LOCATION” />
<uses-permission android:name=”android.permission.
ACCESS_LOCATION_EXTRA_COMMANDS” />
<uses-permission android:name=”android.permission.READ_PHONE_STATE” />
<uses-permission android:name=”android.permission.INTERNET” />
<uses-permission android:name=”android.permission.RECEIVE_SMS” />
<uses-permission android:name=”android.permission.RECORD_AUDIO” />
<uses-permission android:name=”android.permission.MODIFY_AUDIO_SETTINGS” />
<uses-permission android:name=”android.permission.READ_CONTACTS” />
<uses-permission android:name=”android.permission.WRITE_CONTACTS” />
<uses-permission android:name=”android.permission.WRITE_EXTERNAL_STORAGE” />
<uses-permission android:name=”android.permission.ACCESS_NETWORK_STATE” />
<uses-permission android:name=”android.permission.GET_ACCOUNTS” />
<uses-permission android:name=”android.permission.BROADCAST_STICKY” />
Snapshot of the above code:

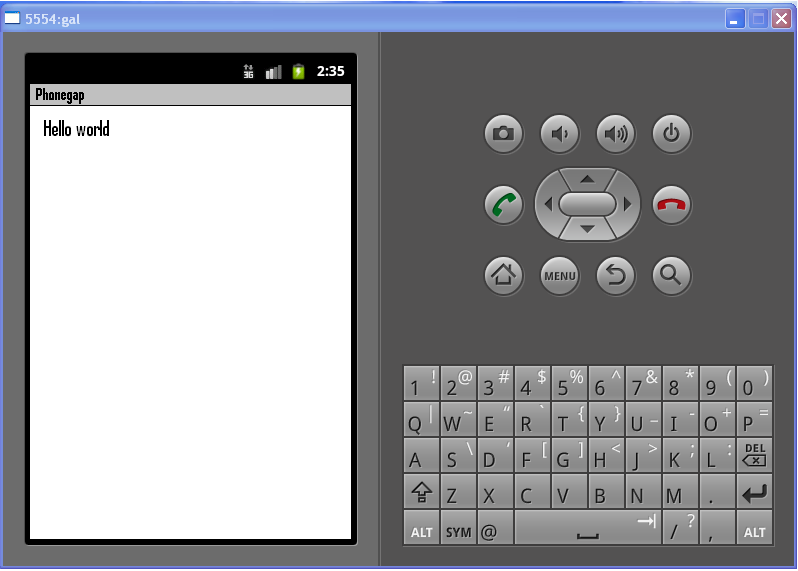
4. Hello World Android App
- Create and open a new file named index.html in the assets/www directory. Paste the following code:
<html>
<head>
<title>Cordova</title>
<script type=”text/javascript” charset=”utf-8″ src=”cordova-1.9.0.js”></script>
</head>
<body>
<h1>Hello World</h1>
</body>
</html>
You can put any Html,Css,Javascript code and create an Android App out of it.
5. Deploy to Simulator
Right click the project and go to Run As > Android Application.
Eclipse will ask you to select an appropriate AVD. If there isn’t one, then you’ll need to create it.